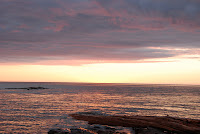
The above sequence of photos is a bracket set of sunset photos, the darkest is underexposed (Showing best the color of the sunset), The middle is a normal exposure and the bottom is the overexposed (showing the clouds best). When we are done we will have combined these three photos to get the best of all attributes!!
**To create bracketed shots for HDR images i recommend using a steady tripod. Any movement in the photos could mess up the final image.
Step 2.Download some free software that will combine the photos.
Heres where we really save money!! You can follow my advice and download this free software that does a great job, or....you can purchase an add-on to a program like photo shop that will cost you hundreds of dollars. Your choice.
The program is called Qtpfsgui. It was originally a linux only program but there are now windows and Mac versions. I prefer linux (But thats a topic for another blog), but as most people use windows or Mac i will use the windows version for demonstration.
Go to this site and download the program for your appropriate operating system.
http://qtpfsgui.sourceforge.net/Install and open it. You should get a window like that seen on the Right.
You now need to download your photos to the computer and know the location. We are going to create the HDR from the three bracketed images.
 Step 3.
Create the HDR
Using the Qtpfsgui select the button at the upper left corner of the screen "New HDR..." The HDR creation wizard will show up. Now select load images and select the three images you are going to use.
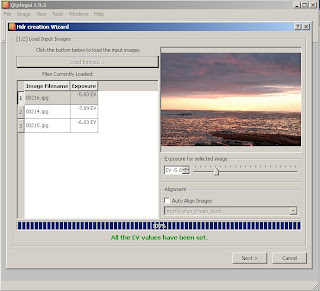
On the left is an example of the screen. Once the program has loaded the images click next. It will open another window titled editing tools. This is to help you line up the three images. Don't worry about the other stuff for now just the four arrow buttons. You will see that it has a reference image selected. You now need to select the other two "editable" images and line them up using the arrows. It is easy to do this if you find hard edges in the image. In my case the horizon and rocks. Once the images are lined up as best they can be click next.

Right now do not mess with any of the Settings for HDR creation, that will just make things confusing. Click finish. Depending on how fast your computer is this may take a while.
Once the HDR is complete it will appear in the window we saw originally. Press "w" on the keyboard to fit the image to the window.
You will notice that the image does not look super spectacular yet. That is because true HDR cannot be seen on a moniter. The image now has "depth" to flatten it to something we can see we now need to tonemap it!
Step 4.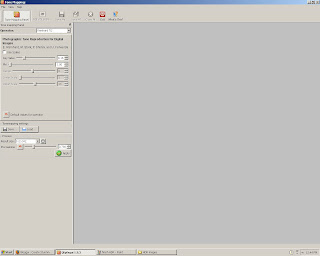
Tonemap the HDR
Dont worry about too many settings right now you can play with them later. Press "Tonemap the HDR". Another window should show up. like the one on the right.
In the selections on the left you can select your "operators" Which are basically equations that do the tonemapping. Now it's just a matter of trial and error. Try different operators and settings and click apply. Your completed images are initially small because they are for preview purposes. Once you see somthing you like you can up the resolution in the "result size" box, but the larger the image the longer the processing time. Now play around with the settings until you get somthing great!! It takes some practice but in no time at all you will be creating studding HDR images for free!
The below image was created using Drago, .54 bias, .788 pregamma then adjusted the Levels.


 The above sequence of photos is a bracket set of sunset photos, the darkest is underexposed (Showing best the color of the sunset), The middle is a normal exposure and the bottom is the overexposed (showing the clouds best). When we are done we will have combined these three photos to get the best of all attributes!!


